当数据源配置好之后,就可以发布EJB项目了。下面以一个简单的例子为例:
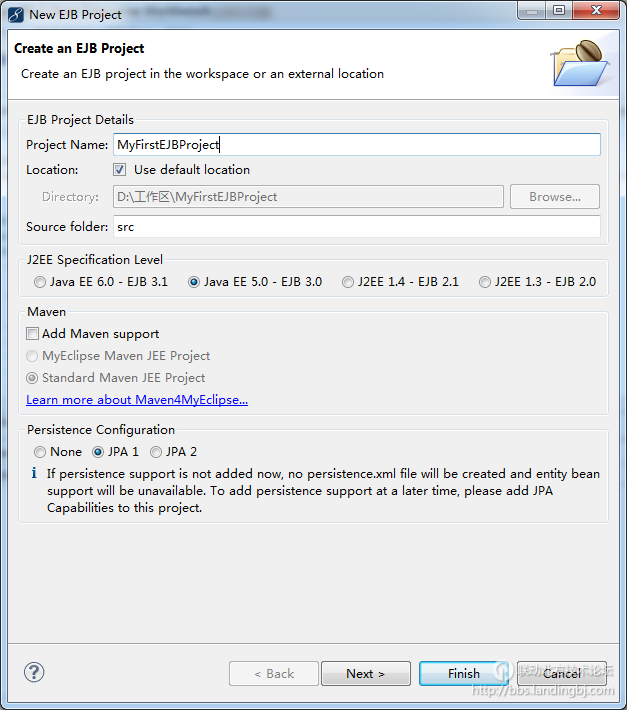
新建一个EJB项目

本机新建的项目名称是MyFirstEJBProject
继续下一步

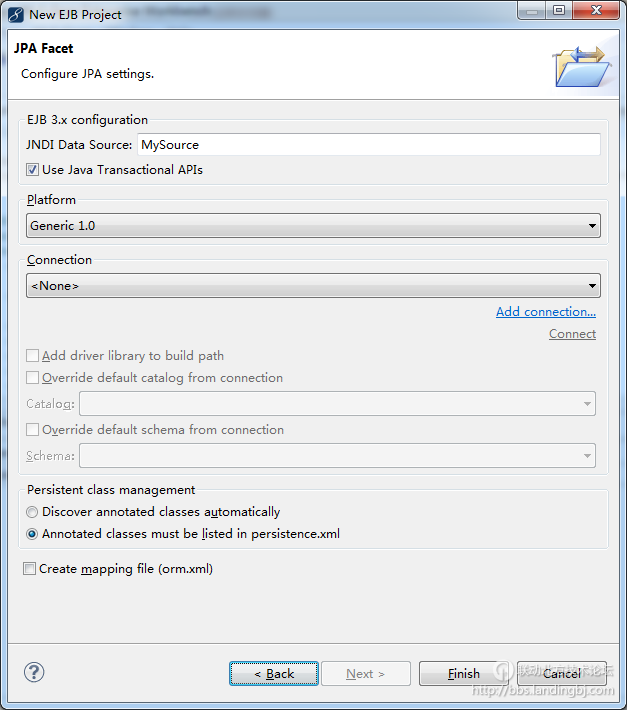
选择JNDI数据源,本机选择MySource,(http://bbs.landingbj.com/t-0-347781-1.html)
点击完成。
在新建类之前,需要weblogic提供的很多jar包,参考了网上的方法,如下
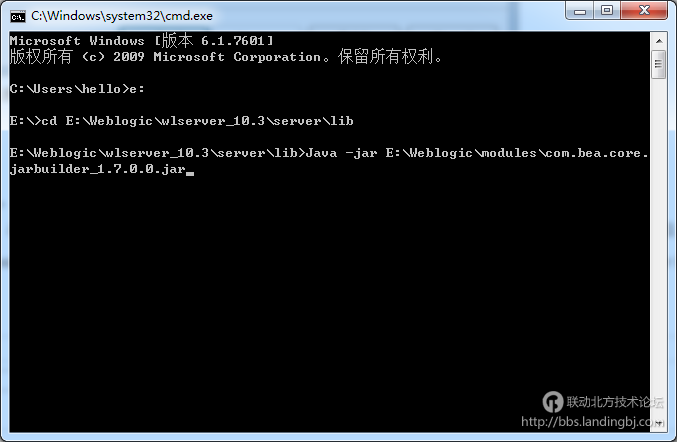
在cmd窗口中,打开Weblogic安装目录下的server下的lib,本机中的是:E:\Weblogic\wlserver_10.3\server\lib
然后,输入Java -jar E:\Weblogic\modules\com.bea.core.jarbuilder_1.7.0.0.jar (java和jar后面都有空格)


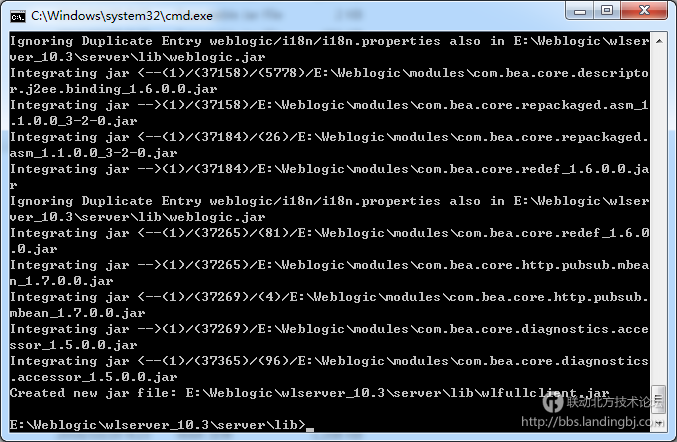
回车,当jar包导入完成之后,会在E:\Weblogic\wlserver_10.3\server\lib 生成这个架包

生成之后,就是导入了,这里不做赘述。
下面是代码:
MySessionBean,java
package com.yuyu.ejb;
import javax.ejb.Remote;
@Remote(value=MySessionBean.class)
public interface MySessionBean {
public String say();
}
MySessionBeanImpl.java
package com.yuyu.ejb;
import javax.ejb.Stateless;
@Stateless(mappedName = "MySessionBeanImpl")
public class MySessionBeanImpl implements MySessionBean {
@Override
public String say() {
return "Hello Yuyu";
}
}
Test.java
package com.yuyu.ejb;
import java.util.Properties;
import javax.naming.Context;
import javax.naming.InitialContext;
public class Test {
public static void main(String[] args) {
Properties p = new Properties();
p.put(Context.INITIAL_CONTEXT_FACTORY, "weblogic.jndi.WLInitialContextFactory");
p.put(Context.PROVIDER_URL, "t3://localhost:7001");
try{
InitialContext ctx = new InitialContext(p);
MySessionBean bean=(MySessionBean)ctx.lookup("MySessionBeanImpl#com.yuyu.ejb.MySessionBean");
String say = bean.say();
System.out.println(say);
}
catch(Exception e) {
e.printStackTrace();
}
}
}
然后在Weblogic中发布这个项目,(http://bbs.landingbj.com/t-0-347401-1.html)
再运行,第一次运行的时候,有点慢,得到下面的结果:

一个简单的例子就完成了;如果以前用Weblogic发布过其它项目,项目发布的时候会出现
java.lang.NullPointerException的异常,这时候,在E:\Weblogic\user_projects\domains\base_domain\config下
找到config.xml,删除掉里面<app-deployment>开头的,这是以前部署进去的application,再重启发布就可以了。


 技术讨论
技术讨论