所谓跨进程就是说2个不同的应用。
这个应用调用另外一个应用里面的服务。
使用aidl,即Android Interface Definition Language,即Android接口定义语言。
跟之前的绑定Service的方法差不多。
使用aidl方式的话可以进行跨进程调用Service.
先简单写一个aidl文件:其实可以先写一个java接口
比如:
package com.example.activity02;
public interface IStudentService {
String query(int index);
}
然后把java后缀名改为.aidl,发现会出错,因为aidl的语法,interface前面不用加public
所以正确的应该是:
package com.example.activity02;
interface IStudentService {
String query(int index);
}
当你写好后,会发现在gen的文件夹中的对应包中会有IStudentService的类,这是自动生成的。
接下来就是
写一个Service:
package com.example.activity02;
import android.app.Service;
import android.content.Intent;
import android.os.IBinder;
import android.os.RemoteException;
public class StudentService extends Service{
private String[] arr=new String[]{"刘备","关羽","张飞"};
private String queryName(int index){
return arr[index];
}
@Override
public IBinder onBind(Intent arg0) {
return new StudentBinder();
}
class StudentBinder extends IStudentService.Stub{
@Override
public String query(int index) throws RemoteException {
return queryName(index);
}
}
}
这个Service的代码跟之前的帖子是差不多的,只是之前的帖子,StudentBinder是先继承Binder然后再实现自定义接口,IstudentService.Stub是系统自动帮我们生成的抽象类,继承了Binder对象,也实现了我们刚才在aidl文件中定义的接口。
前面的内容是一个应用,下面我们新建另外一个应用。
复制在前面应用中写的aidl文件。
然后我们也像前面的那个帖子一样调用query 查询信息。
Activity:
package com.example.activity02;
import com.example.android02.R;
import android.app.Activity;
import android.content.ComponentName;
import android.content.Context;
import android.content.Intent;
import android.content.ServiceConnection;
import android.os.Bundle;
import android.os.IBinder;
import android.os.RemoteException;
import android.view.View;
import android.view.View.OnClickListener;
import android.widget.Button;
import android.widget.EditText;
import android.widget.TextView;
public class Activity04 extends Activity{
private EditText text1=null;
private TextView text2=null;
private Button btn=null;
private IStudentService service=null;
@Override
protected void onCreate(Bundle savedInstanceState) {
super.onCreate(savedInstanceState);
setContentView(R.layout.activity_main);
text1=(EditText)findViewById(R.id.text);
text2=(TextView)findViewById(R.id.text2);
btn=(Button)findViewById(R.id.btn1);
Intent intent=new Intent();
intent.setAction("abcdefg");
bindService(intent, new StudentServiceConnection(), Context.BIND_AUTO_CREATE);
btn.setOnClickListener(new OnClickListener() {
@Override
public void onClick(View arg0) {
try {
text2.setText(service.query(Integer.parseInt(text1.getText().toString())));
} catch (NumberFormatException e) {
e.printStackTrace();
} catch (RemoteException e) {
e.printStackTrace();
}
}
});
}
class StudentServiceConnection implements ServiceConnection{
@Override
public void onServiceConnected(ComponentName componentName, IBinder binder) {
service= IStudentService.Stub.asInterface(binder);
}
@Override
public void onServiceDisconnected(ComponentName componectName) {
service=null;
}
}
}
内容跟前面的activity差不多。
需要注意的是,因为是跨应用,所以就不好直接用setClass 这样的显示Intent去调用Service,
可以使用setAction addCategory等隐式Intent去调用另一个应用的Service。
在上个应用中 我是这么配置service的。
<service android:name="com.example.activity02.StudentService">
<intent-filter>
<action android:name="abcdefg"/>
</intent-filter>
</service>
还有个值得注意的是,在上一个帖子里,我们是通过自定义接口来接收得到的IBinder,使用aidl后,可以直接调用IStudentService.Stub.asInterface 这个方法得到接口,然后调用方法。
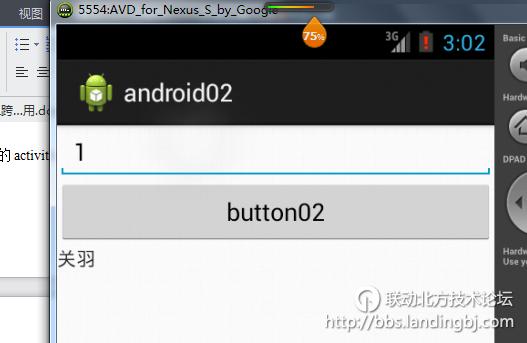
效果:


 技术讨论
技术讨论